Farseer – Step by Step")
How to Paint an Aeldari (Eldar) Farseer – Step by Step
Greetings, Hobby Pigs*,
Back in the day, and I mean WAAAAAAY back in the day, a young boy held in his hands a White Dwarf that showed him unearthly delights. The year was 1990 and the month, July.
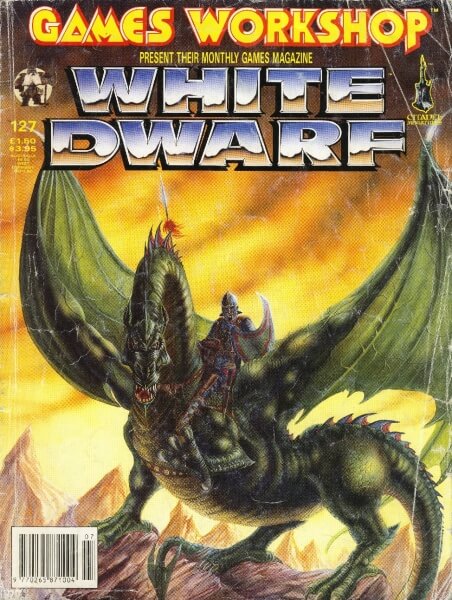
He instantly fell in love with the sleek lines and lithe figures of the brand new Eldar Aspect Warriors miniatures. The figures stand out as classics in the Warhammer 40000 range. The original Eldar Aspect Warriors were designed by Jes Goodwin and the appearance of the current range closely mirror these classics.
The boy was able to cash in lawn-mowing favours for an order to the only outlet available: the hallowed land of YouKay and the mythical GeeDub Mail Order.
Endless eons wheeled and passed (much like the start of Monkey) and armies came and went from the boy’s possession. Some of them were even painted!
Now, as a … more mature … gamer, the boy feels the pull of the Eldar and their Harlequin allies. He has always lived by the sage advice, “friends don’t let friends play Eldar”, and feels conflicted and a little dirty by the stirrings just slightly above his loins.
Trust not in their appearance, for the Eldar are as alien to good, honest men as the vile Tyranids and savage Orks. There is no understanding them for there is nothing to understand – they are a random force in the universe.
Imperial Commander Abriel Hume
It may be nostalgia, or possibly the stroganoff for lunch.
The boy wonders back to the days of his youth and the wonders of the Eldar Aspect Warrior army he sold/lost/gave away.
After a visit to my local Games Workshop, I picked up one of the new plastic Eldar Farseers. The things that Games Workshop can do with plastic are really amazing.
As part of my newly rediscovered hobby, I spent a bit of time painting the Farseer with the long term goal of building a force to go with him.
Firstly, an apology. I took photos of the original process, however, they were too blurry to be of any use. I had to retake them and that is why the photos are of the completed miniature.
STEP 1: Assembly and Shaded Base Coat
Assembly of a multipart model is always a challenge. Is it better to paint first and then assemble or assemble and then paint?
Unless there are any major obstacles, I find it’s easier to assemble first and then paint.
Following assembly, I primed the figure with white undercoat. The undercoat helps the paint to adhere to the model. A white undercoat will also make the colours painted on top brighter than a black or grey undercoat.
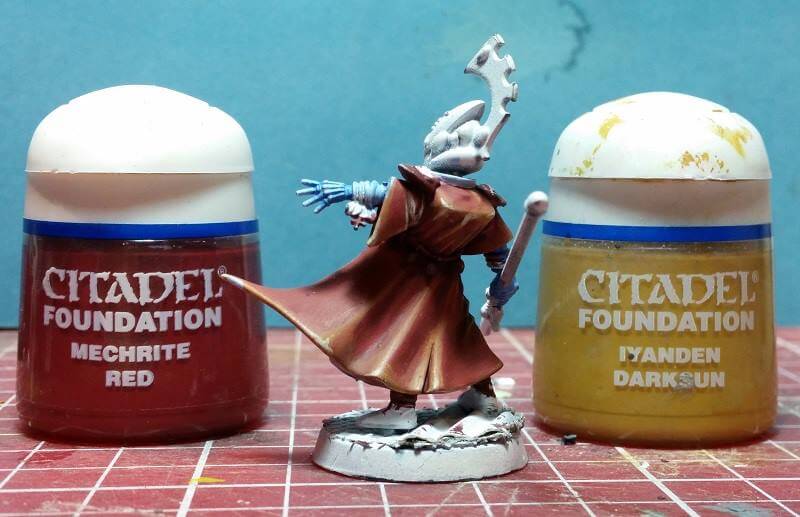
I began painting the Farseer’s cloak with a 2:1 mix of Mechrite Red and Rhinox Hide. I thinned the base coat with a few drops of water to help with the flow of paint. The only downside is that it now took a couple of thin coats to get an even coverage.

STEP 2: Highlighting the Farseer’s Cloak
Repaint the Mechrite Red on the raised area. This should leave the shaded base coat in the recesses.
Once that’s dry, highlighting is a 2:1 mix of Mechrite Red and Iyanden Darksun applied to along the rigid part of the cloak and also around the edges of the sleeves.
A follow-up highlight is made by adding some more Iyanden Darksun to the first highlight. This is applied sparingly to just the very edges or highest part of the miniature.
Make sure the paint is thinned with a little water to make sure it flows smoothly. Be careful not to over thin the paint as it will flow out of control when you apply it.
I have found through trial and error that only a little water is needed and it’s better to have to add more than try and take some out.
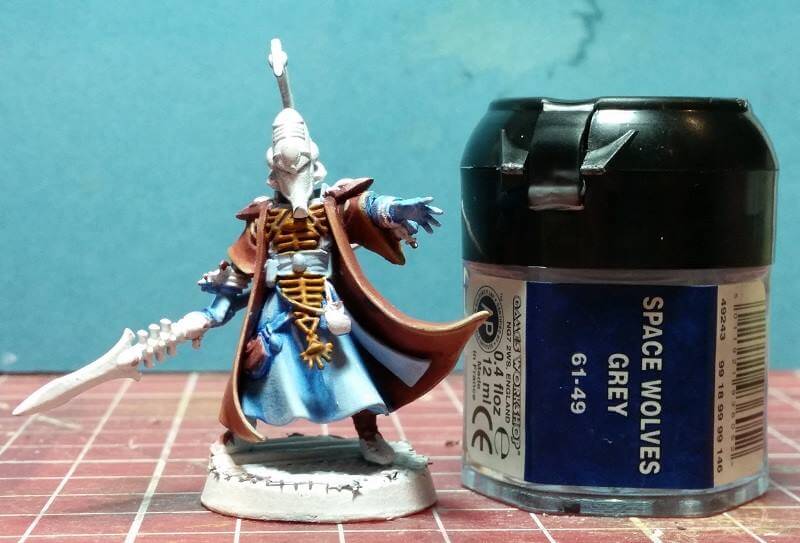
STEP 3: Base Coating the Robes
For the robes, apply some thinned down Space Wolf Grey across the whole area.
If (like me) you get paint from the coat on the robes, you may need to apply a couple of thinned coats. It’s better to apply a couple of thinned coats than one thick coat. Thick paint will dry terribly and can leave an uneven finish.
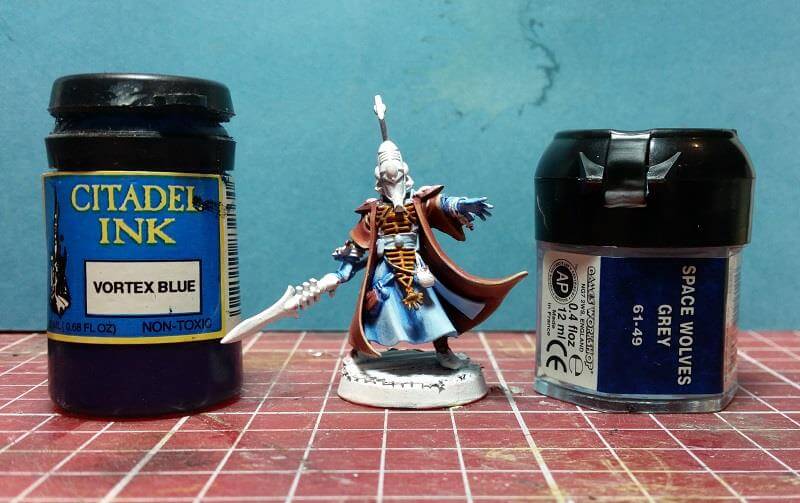
STEP 4: Using a Glaze to Shade the Robes
Glazes should be translucent; meaning that when applied, it will be tinting the colour underneath. A glaze should cover and tint the entire surface it is painted on. A glaze is meant to stay where you put it.
I’m aiming to glaze the Space Wolves Grey with a darker blue colour. I found a number of tutorials about glazing.
It was also a bit of seat-of-the-pants painting while I figured it out.
The glaze is a mix of (approximately) 3:1:3 Space Wolves Grey, Blue Ink (or a suitable darker blue paint) and water. It’s a bit of experimentation to get the mix right.
Ideally, you want a slightly darker colour than the base coat. The mix should be noticeably thinner than the base coat, even. The mix should be thinner than a normal ink.
The glaze should be applied in two or three coats, applying liberally at first coat, and then concentrating on the recesses with subsequent coats. Make sure you wait until the glaze is properly dried before applying the next glaze.
This will create deeper and darker shadows in the depth of the robes while only lightly tinting the base coat.
This process is best practiced on a tester miniature; it’s not something that I found came easily.
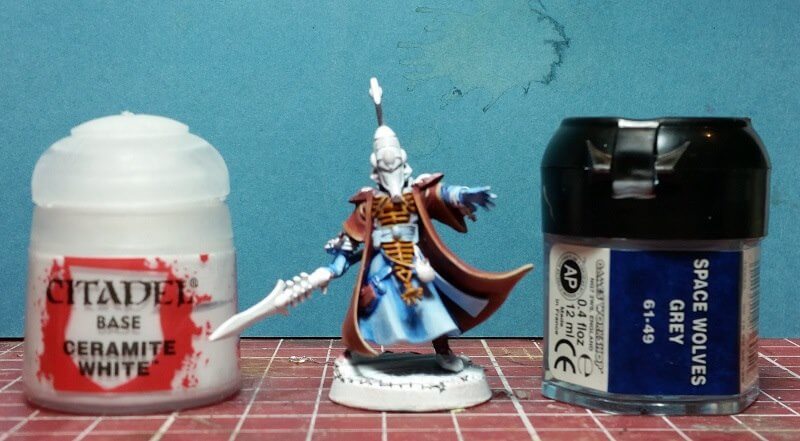
STEP 5: Final Highlights of the Robes
The final stage is to reapply a light highlight to the top folds of the robes.
Once the previous steps are fully dried, reapply thinned Space Wolves Grey to the top folds of the robes. This is similar to what I did for the shaded base coat used on the coat above.
Next, a 2:1 mix of Space Wolves Grey and Ceramite White is applied about from halfway down the robe to the edges. A final edge highlight can be applied to the robes by adding more White to the highlight.
The other technique I wanted to try was “free hand” on the miniature. Specifically on the robe and coat (as you can see below).
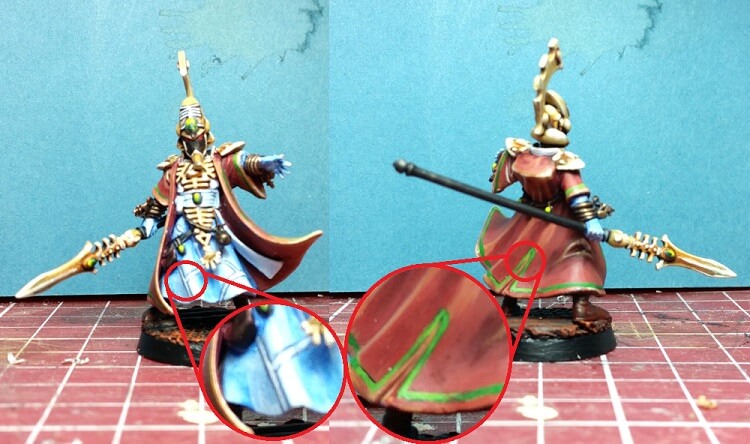
It is exactly as it sounds, freehand drawing or painting onto the miniature to add additional detail. This works really well on large, flat areas like Space Marine armour.
It is extremely fiddly though. I sought advice from a few of the forums and Facebook groups dedicated to painting miniatures and have found the following list to be a good summary of my experiences:
- Make sure your paint is nice and thin. The closer to an ink it is, the more easily it will flow when applied. I think this should become our mantra when painting. Not just for glazes and free hand, but more generally. Thinned paint is easier to apply and control. The only downside is that you may need to apply a couple of coats to get good coverage.
- Don’t be afraid to correct your mistakes with the base colour.
- Have a good reference, a sketch or a photo. Do the free hand on a clean palette multiple times to build the confidence.
- Practice simple large images on a palette first, gradually getting smaller as you build your fine motor skills and get a sense of it. Break your image down into basic geometric shapes. Draw (or stencil) these onto the model in fine grey lead pencil. Water down some black and use a sharp tipped brush to go over the penciled lines. Fill in the shapes with the desired colour(s), leaving a thin edge of the black for definition. Highlight each colour as if the image had natural edges. Any visible pencil marks can be removed gently with an eraser or covered over with a Shade/Wash.
- Build Your painting In a lot of layers. Patiently with darker colours first. Your hand muscles and your brain will create gesture memory.
- Draw on some paper. Use a pencil to do an outline onto the model before painting too.
- Prepare to be frustrated, it’s a whole new skill to learn.
- Practice. Lots of practice.
- Just do it
Completed Eldar Farseer
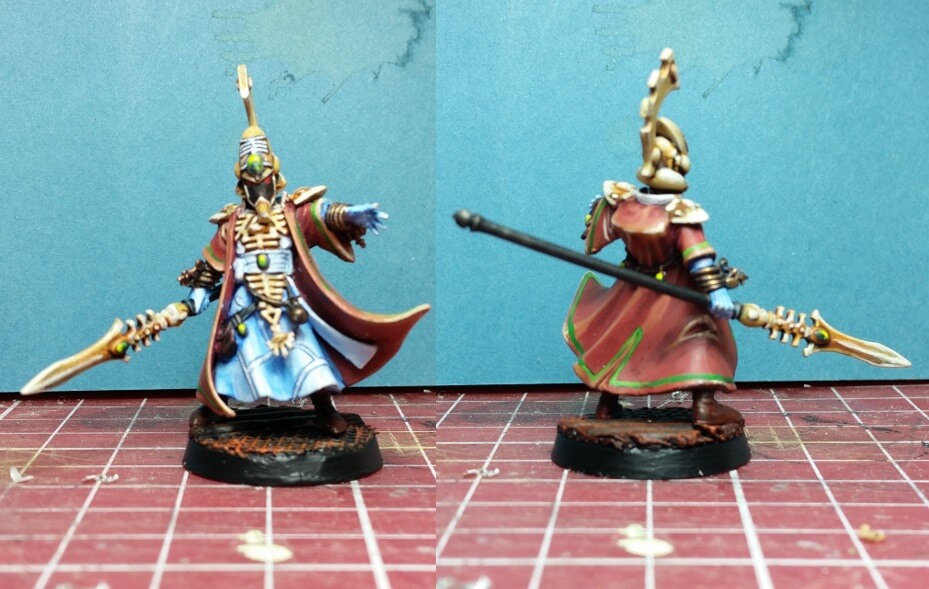
Shown above is the completed, glazed and freehand painted Eldar Farseer. You can see from the zoomed shot above that the first attempt at freehand is moderately successful. I used a black 0.005 technical pen from Kuretake to mark out the freehand parts and then built up the layers of paint from there.
As an experiment, I am happy with the results. I finally understand using glazes and am looking forward to getting more consistent results when I use them. Freehand will be a long process, mostly due to the limits of my artistic skills …
Hopefully, you’re all excited about using glazes and free hand. I’m looking forward to revisiting another miniature with a lot of nostalgia value: Maugan Ra.
*I promise it’s a compliment (http://vooza.com/videos/code-pigs/)